The Gennaker Tack, Part 1
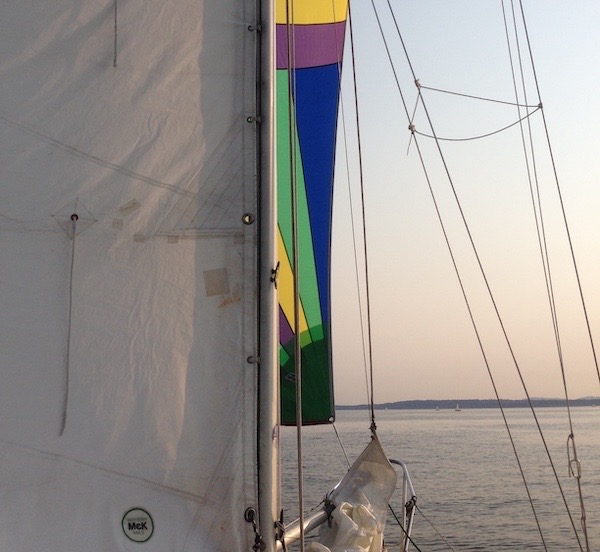
I had been sailing Sampaguita, my 1985 Pacific Seacraft Flicka 20, for five years with a tedious setup for the gennaker, which meant I would rarely use it. The question I eventually asked myself was, “How do I modify the cranse iron on the bow to accommodate the gennaker tack for efficient flying and jibing of the sail?” After crewing on a few race boats, I picked up some ideas on how to improve Sampaguita’s setup.

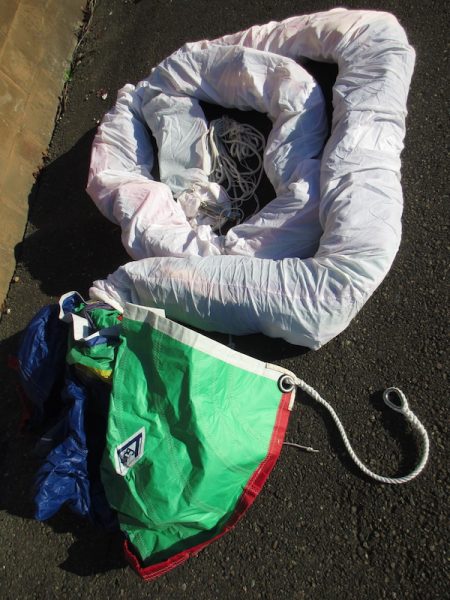
For those who don’t know, a gennaker is a hybrid of a Genoa sail and a spinnaker. It’s a light-wind, lightweight, often colorful sail, like a spinnaker. However, the tack and the clew remain the same, like a genoa’s. You can use a pole, but unlike a spinnaker, it is not necessary — neither are the associated guy lines. It works well as a shorthanded, small-boat sail on a beam to broad reach in light to moderate winds. My gennaker also came with a “sock,” a very convenient accessory when shorthanding.
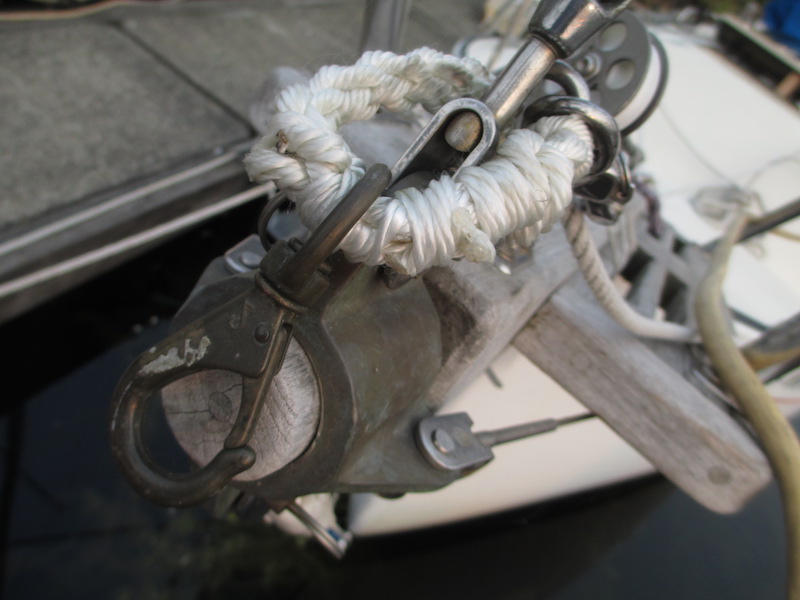
A cranse iron is a stainless steel or bronze fitting that is on the far end of the bowsprit. The forestay, bobstay and bowsprit shrouds attach to this iron as strong points. On Sampaguita, this iron has two topside attachment points, one for the forestay and one just aft of that for the jib or genoa. A long D-shackle attaches to the aft point, with a snap shackle attached to it. A jib or genoa tack snaps to this shackle and is a satisfactory setup for these headsails.

Formerly, I attached the tack of the gennaker to the same snap shackle used for the jib and Genoa sails. To gybe, I wind shadowed the sail with the mainsail and released its sheet. Then I went to the foredeck and doused the sail with the sock. Next, I unsnapped the sail’s pendant from the shackle, led it around the outside of the forestay and re-snapped it from the other side, and swung the socked sail over the forestay to match. Back to the cockpit, where I gybed the mainsail over and put the boat on a course that wind shadowed the gennaker in its new position. Again to the foredeck, I pulled up the sock and released the sail. Back to the cockpit where I adjusted course, allowed the gennaker to fill, and trimmed the sails.
Are you exhausted from reading that? Fortunately, the Flicka tracks well, but simplification was necessary to reduce tedium and time and increase safety and enjoyment. The single most important change would be to have the gennaker tack attached in front of the forestay. The sail could then be gybed from the cockpit with one smooth motion, eliminating travel to the foredeck and the associated actions.

A new cranse iron with an additional topmost attachment point was one solution. However, bronze casting and stainless steel manufacturing are costly. Another solution could be to install a roller-furling headsail system, which by attaching to the aft point on the cranse iron, would free up the forward one for the gennaker. The furling headsail would be an upgrade, but at great expense and labor. In addition to buying and installing the furler, a new headsail to fit would be necessary too.
Then it occurred to me to create a type of soft shackle using materials I had on hand. It would take about an hour to make, and I could add it to the existing setup. I figured it was worth a go.
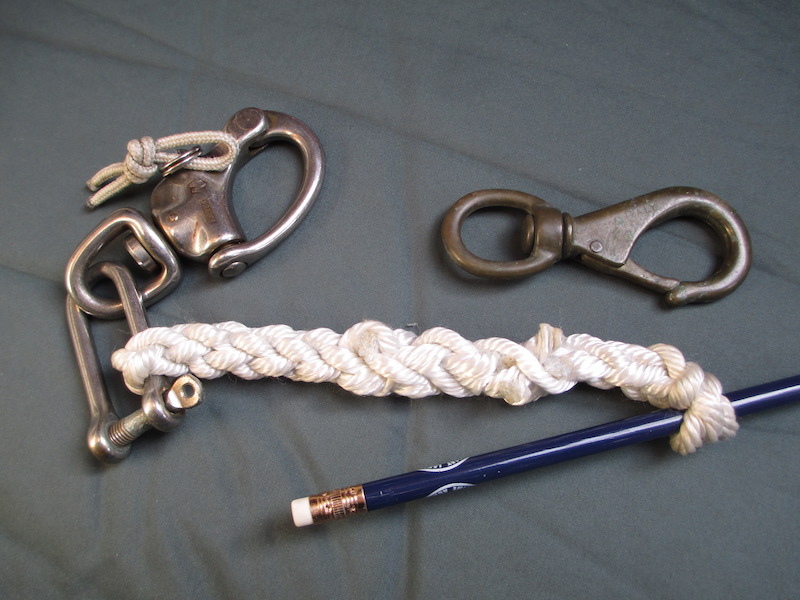
Let me say this is not a soft shackle in the traditional sense, though the words fit the creation. First, I removed the long D-shackle used for the jib and genoa from the cranse iron so that I could work in a comfortable place. I also removed the snap shackle for the ease of handling. I found a piece of 5/16″, 3-strand nylon line about 12″ long that I had left over in my bag of “small stuff.” I chain spliced this line to each side of the D-shackle with the tucks meeting in the middle forming a 6″ loop. Carefully, I slid one of the chain splices from the shackle in a way that kept the lead space open. I would later reinsert the shackle into this lead. A pencil worked well as a placeholder. I returned the snap shackle to the D and added a snap hook over the spliced line. This last would be for the tack of the gennaker and would slide over the spliced line as the sail jibed from side to side.

This next step took concentration as I was working over the water. One slip could lose all three pieces of hardware in the canal. Up at the bowsprit, I led the spliced line on the outside of the forestay. I reinserted the D-shackle into the chain splice lead I had carefully kept intact and reinstalled the shackle to its original point on the cranse iron. The line forms a loop around the forestay on which the snap hook can freely slide from one side of the D-shackle to the other. Finally, I added whipping to the spliced line where the tucks met, securing and smoothing the area so the snap hook wouldn’t get snagged on them.
Readers — We’ll bring you Part 2 of Joshua Wheeler’s Resourceful Sailor Series: The Gennaker Tack, next week. If you have any thoughts on this bit of maintenance, please let us know.

In the great tradition of sailing, a boat should be able to be made right-modified as need be.
With ingenuity, curiosity and marlinespike skills, it gets done.
Are you happy with the change?
Yes, with a more detailed answer coming up in Part 2. Thanks for reading.
That bronze snap is pretty weak for a gennaker tack. Snap shackle better and safer in
Thanks for reading. Yes, that is acknowledged in Part 2. I hope you come back and check that out. Thanks again.