The DIY ‘LL, Part 1
Way back in December 2017, we asked, "What’s your best temporary fix," or something that you MacGyvered while underway, far from the comfort of a boatyard, chandlery or docks full of sailors’ brains to pick? The question piggybacked on an early query: "Did you tackle a project that you really didn’t think you could manage — a project that you were going to pay a professional to do, before you asked for advice on the dock, watched a YouTube video, and decided to take a shot?"
We’ve scoured our email archives because it’s boatyard season. In the May issue’s feature Yard Work, we celebrate the gradations of boat work. A quick fix and a DIY can be synonymous; what was done as a repair on the fly could easily turn into the way that part of your boat works now. Farther down on the scale and greater in severity are the refit and restoration. But wait, let’s not get too technical — all of this work falls under the category of resourceful boat owners doing what’s necessary to keep afloat and keep having fun.
So here are some of your responses from last December. Thanks to everyone who wrote in.
"In 2011 I doublehanded my Beneteau 351, Moku pe’a, from Hawaii to Tahiti with my daughter Kara," wrote Bill Leary. "We were 400 miles north of Tahiti and close reaching in 15 knots of wind, when I heard a squeak coming from the llazarette behind Kara’s quarter berth. I crawled back to check it out after she went on watch; the squeak came from the aluminum collar that secures the rudder in place vertically. The collar was rubbing on the Delrin upper rudder bearing as the rudder turned. No problem, a squirt of dish soap eliminated the squeak.

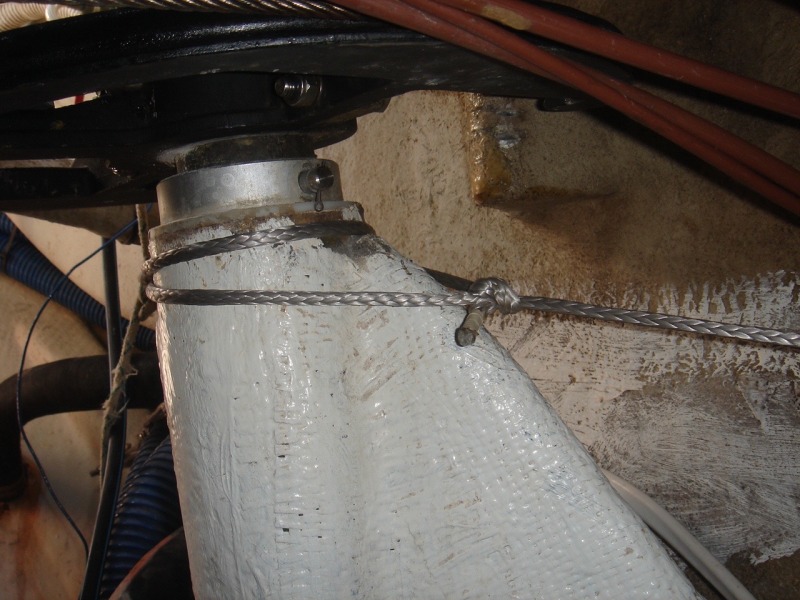
"But I was alarmed to find that the two athwartships fiberglass gussets securing the rudder post in place had torn free where they attached to the hull, and the rudder post was moving back and forth. Yikes! if the movement increased, the fiberglass connection between the rudder post and the hull would likely fail, creating a hole in the hull below the waterline. We reefed down, reduced the rudder loads, and limped into Papeete in one piece, but I needed to secure the rudder post. I had more than 3,000 miles of cruising planned before returning home to Hawaii three months later. But I didn’t have the tools, time, or desire to grind out the glass and make a proper repair in Tahiti, so I looked for an easier alternative."
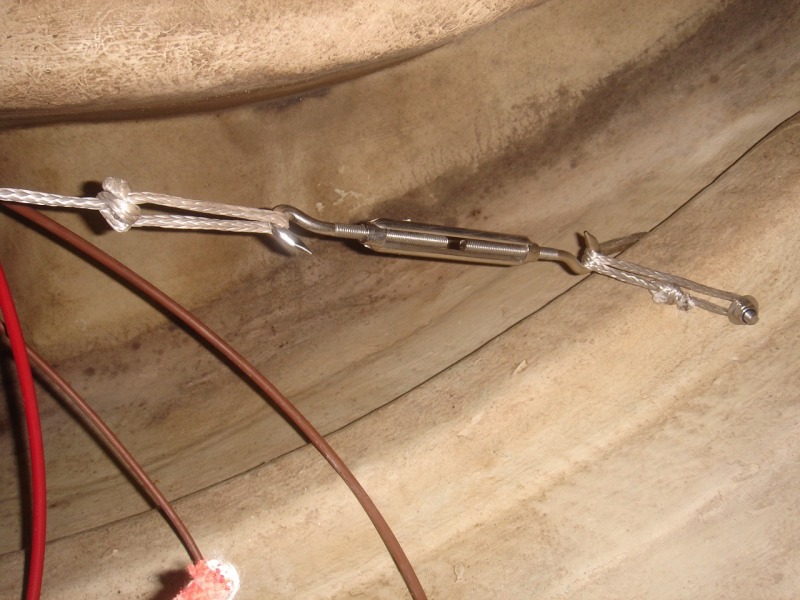
"After analyzing the rudder loads, I decided to secure the top of the rudder post in place using Spectra line and turnbuckles. I tied a piece of Spectra around the top of the rudder post and ran it horizontally to port where I secured it to an existing hull stiffener. I did the same to starboard, tightened the turnbuckles, and I was done! The rudder post was secured in place. I tested it out on a windy sail to Moorea and found no movement at all."

"I left that temporary repair in place for the remainder of the cruise and didn’t get around to making a proper fiberglass repair until more than a year after I returned to Hawaii."
Jim Nash said that his first large boat repair was replacing about a fourth of the plywood bottom of a Philippines-built Thunderbird (Hull# 656), then glassing while the boat was upright. But that was just the start of his repairs to the Thunderbird. "Earlier, on the first voyage from Oahu to Lanai, the mast broke south of La’au Point, Molokai, when a lower shroud gave way after a hard night sailing from Kaneohe. Retrieving the pieces of the mast, I then had to pull the outboard from stowage in the starboard lazarette. The two-cylinder 7.5 horsepower motor would only run one one cylinder despite many attempts, making for slow going. It was a great sail/motor, but I wouldn’t choose to do it the same way again — except we caught fish enough to share wherever we moored or anchored."
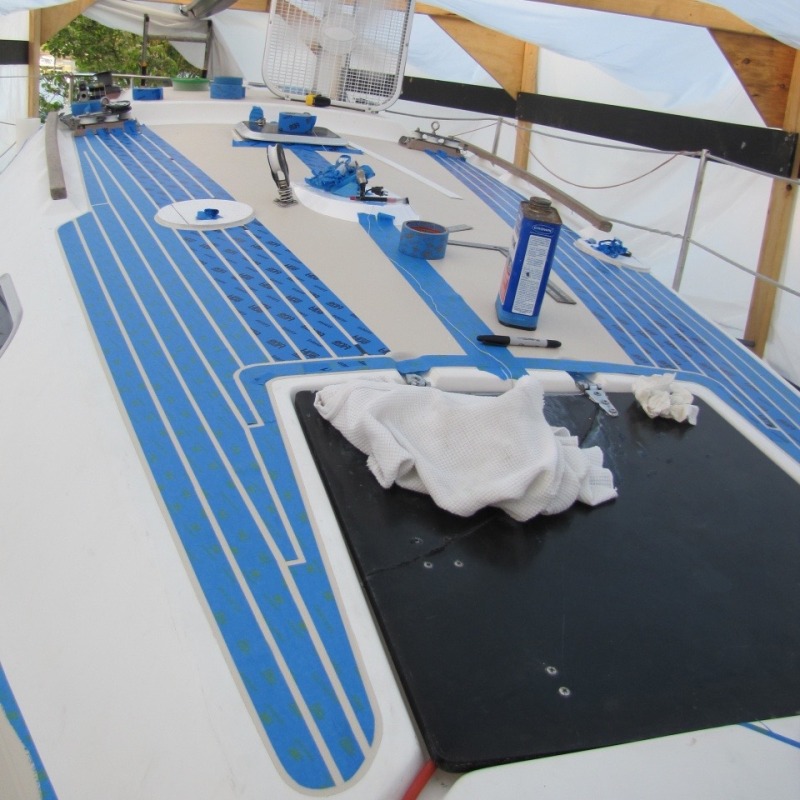
And finally, Paul Brogger from Tenino, Washington, said that he was proud of his "DIY painted(!) faux-teak deck I put on my San Juan 28."

Whether it’s a well-tied piece of Spectra, fiberglassing the bottom of a boat, or redoing your deck, Doing It Yourself requires equal parts of ingenuity, commitment and confidence in your skills. We’ll bring you part 2 of the DIY ‘LL in an upcoming ‘Lectronic.
