
The Resourceful Sailor Performs Sail Surgery
Last week, while preparing our boat to sail for the first time since we began its refit nearly three years ago, we were rethreading the jib into its track when we heard a ripping sound. A quick look showed the main part of the sail to be intact. “No problem,” one thought, while the other knew better. A ripping sound is only produced by the action of ripping. And so, there it was, a small 3/4-inch tear in the luff. It reminded us of this DIY sail repair by The Resourceful Sailor.
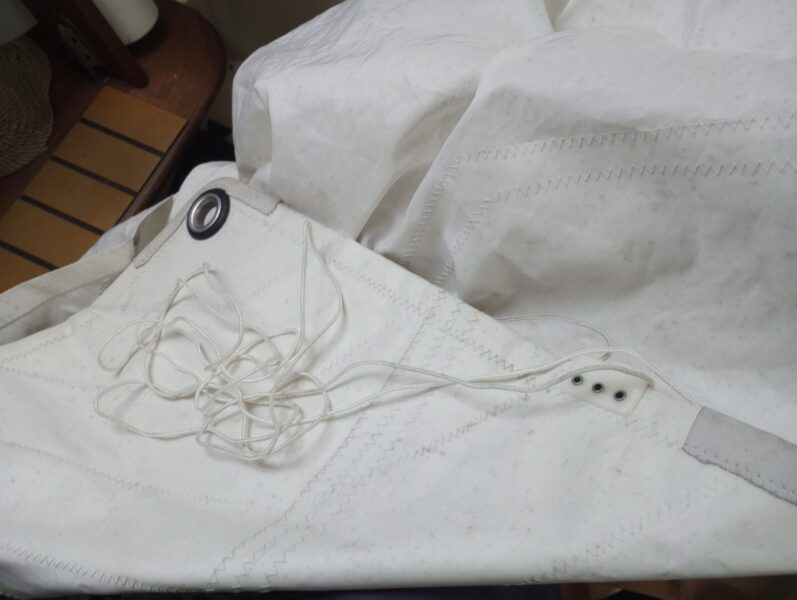
After an exciting beat into Port Angeles Harbor under three reefs and the 80% jib, with building thermal, The Resourceful Sailor reached the western lee of the breakwater aboard Sampaguita, a 1985 Pacific Seacraft Flicka 20. Upon starting the outboard and lowering sail for the approach to the Customs dock in the local marina, the leech line of the jib was discovered partially extracted from the sail and wrapped around the starboard sheet. The best guess was that when the sail was violently flogging on the tacks, the tail wrapped around the sheet. The sheet then came under heavy load, and the tension on the leech line was enough to break it free from the anchor stitching at the head of the sail. Questions of repair were now afoot.
Do I take the sail to a sailmaker? How would a sailmaker repair it? What if a sailmaker was unavailable? How would The Resourceful Sailor fix it? A search for online videos found one on building a leech line into a sail and another on replacing it for a repair. In both instances, they laid the leech line down, sewing the pocket around it. While neither of these was precisely the situation, they gave some insight.
The jib was still in good condition, as was the leech line pocket. To completely disassemble the leech pocket and start from scratch seemed excessive. It would also be much easier with a proper sewing machine, which I did not have. Alternatively, the leech line might be re-inserted into the existing leech pocket and reattached at the head. While this could also be a sailmaker’s choice, it was one I could do on my own.
DIY re-insertion would be the way. The first question was whether to fully extract the line and start from the bottom (the line was at about the midpoint) or begin from where it was. Starting mid-sail would require an incision to retrieve the line end and add a rigid tool for working it through the pocket (like the drawstring on a hoodie or sweatpants). It would also mean a sail repair at this spot. Fully extracting the line first and starting from the bottom would avoid that, but with lack of experience, there was uncertainty on how easy rethreading the line through the stiff Dacron pocket the entire length of the sail would be. Either way, there would also need to be an incision at the head of the sail as an exit point for the threading tool and to be able to manipulate the leech line with the proper loop into its anchor spot for stitching.
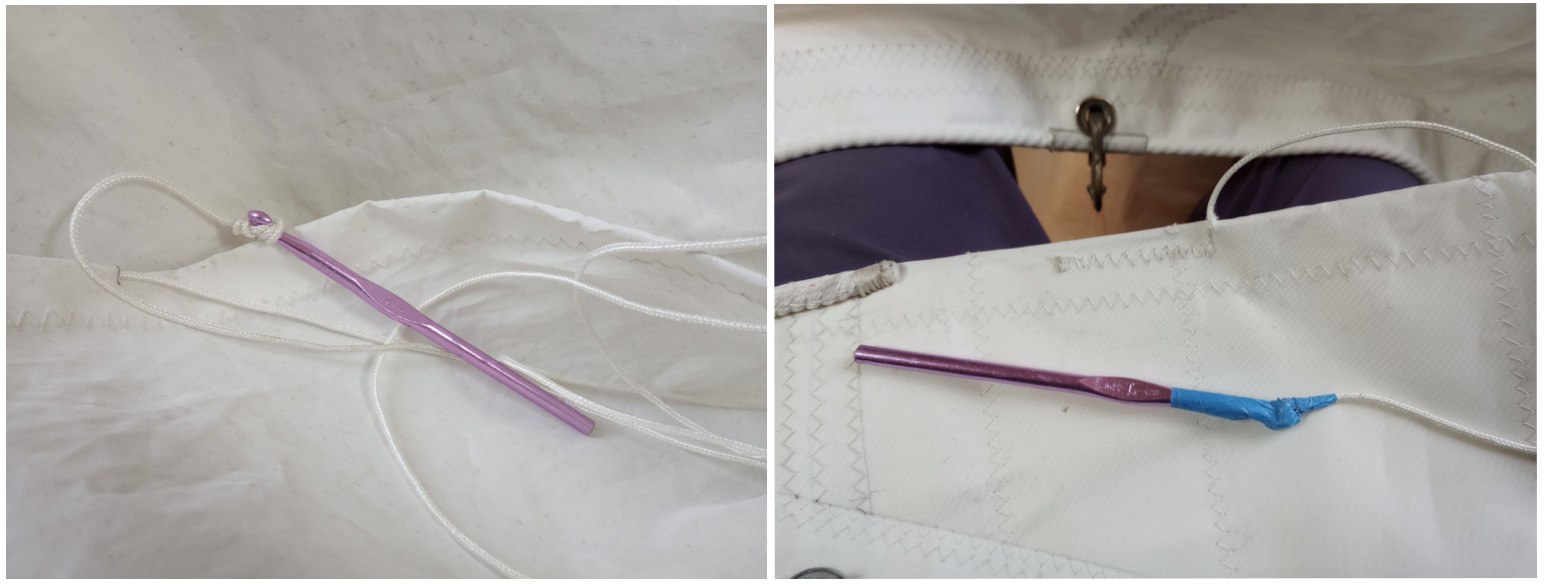
Choosing to start “as-was,” I made a small incision just big enough for the line extraction and the rigid threading tool, a crochet hook, to be inserted. The line and hook were securely taped together, inserted, and pushed to the head of the sail and the exit incision to draw the line through and remove the tool. In hindsight, this was reasonably easy, and the choice to fully extract the line to avoid the mid-pocket sail repair may have been the better option.
The leech line had come free from the stitching rather than breaking. The online videos showed the leech line looped and heavily stitched at the head. It was impossible to tell if this one had been or not. Or whether the subsequent stitching had been thorough. Maybe it was designed to be a weak link to prevent sail tear? The videos did express how the multiple layers of sailcloth in the head were a challenge for even a sailmaker sewing machine.
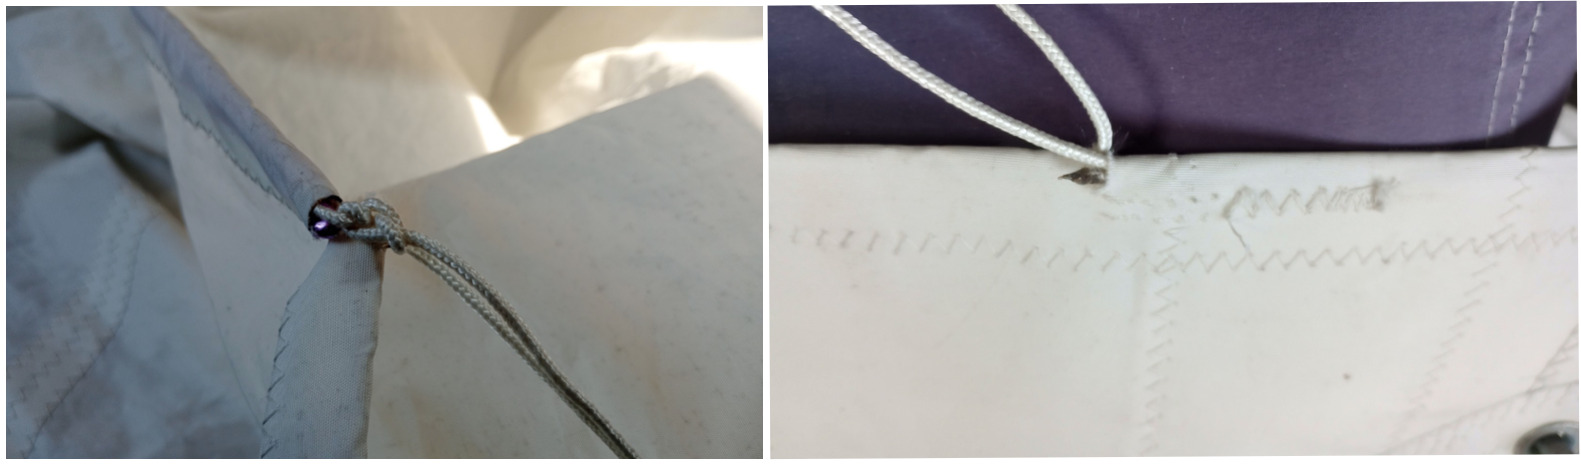
The line was looped and re-inserted through the incision and worked into position alongside the old anchor stitching using an uncoiled paper clip. I then applied new anchor stitching using a sewing palm, a sailmaker needle, and Dacron thread. If the multiple cloth layers were challenging for a hardy sewing machine, you can bet they were especially so by hand. While easier to bend and break, a thinner, long-pointed needle was the best approach to penetrate the cloth. A larger needle would have been stronger, but the resistance of its diameter was too high. The resultant anchor stitch would not win any best-dressed-yachtie awards, but I was confident that it captured the leech line and would do the required job as well as (hopefully better than) the original.
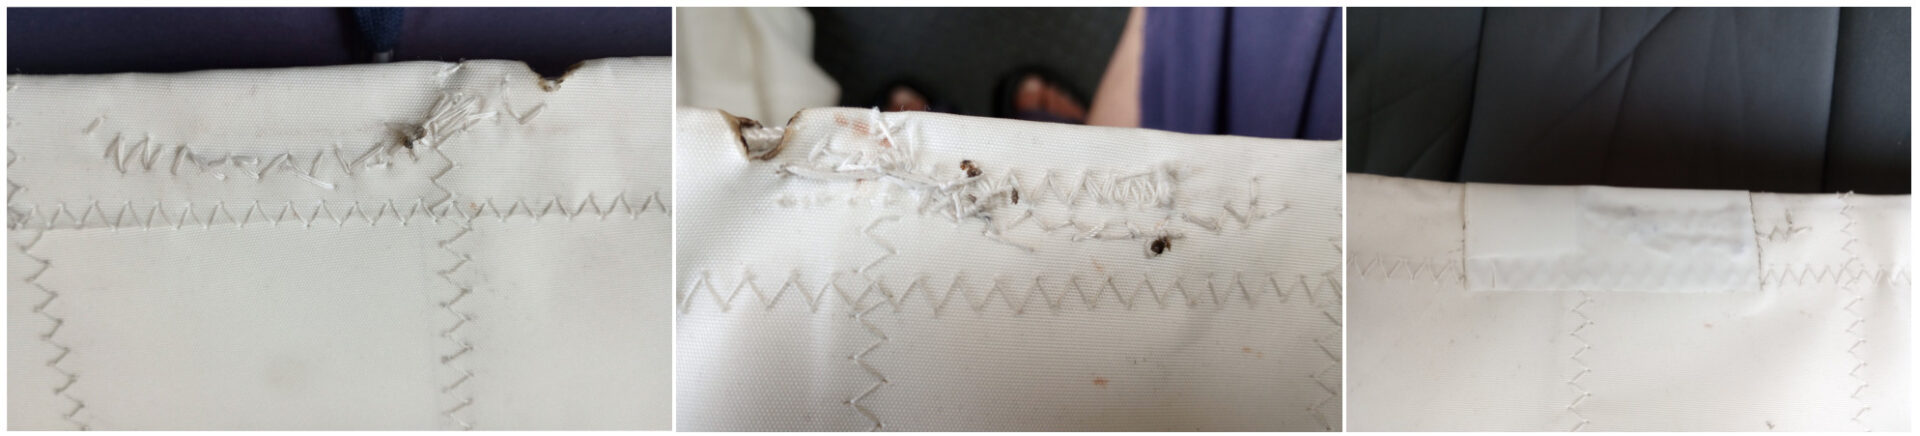
Both incisions received the same repair. First, the cut edges were carefully hot-knifed to seal them to prevent fraying. A small piece of folded sailcloth in those spots over the leech covered both sides of the incisions, with a larger patch of sticky-backed sail tape put over the top of this. Both were hand-stitched along the edges, bringing the integrity of the leech line pocket back to the pre-incision level. The layered head was again the most tedious part, while the mid-leech repair through single and double layers was relatively easy. There was a marked improvement in stitching quality, both as time progressed and with fewer cloth layers.

The Resourceful Sailor is still unsure what a sailmaker’s approach to this repair would be. Boatyard experience has taught “Ask three different tradesmen, get five different answers.” They are satisfied with the result and the knowledge acquired in the process. A sailmaker will not always be available, and DIY is The Resourceful Sailor way. Sampaguita keeps sail repair supplies on board, not for if they are needed, but for when they are.
Remember, keep your solutions safe and prudent, and have a blast.
My sailmaker afterwards mentioned tucking the tail of the leech line back up under itself to shorten and prevent this. I’ve started doing this on all my sails now.