
Sacrificial Sliding Hatch
Sampaguita, my Flicka 20 sailboat, was built in 1985. When I bought the boat in 2013, it had already experienced some wear and tear. One urgent issue to address was the sliding companionway hatch and the channels on the cabin top that it nested in. These surfaces had been worn down over the years. Since I would be living aboard, the hatch would be worked multiple times a day. I needed to act quickly to prevent further damage.
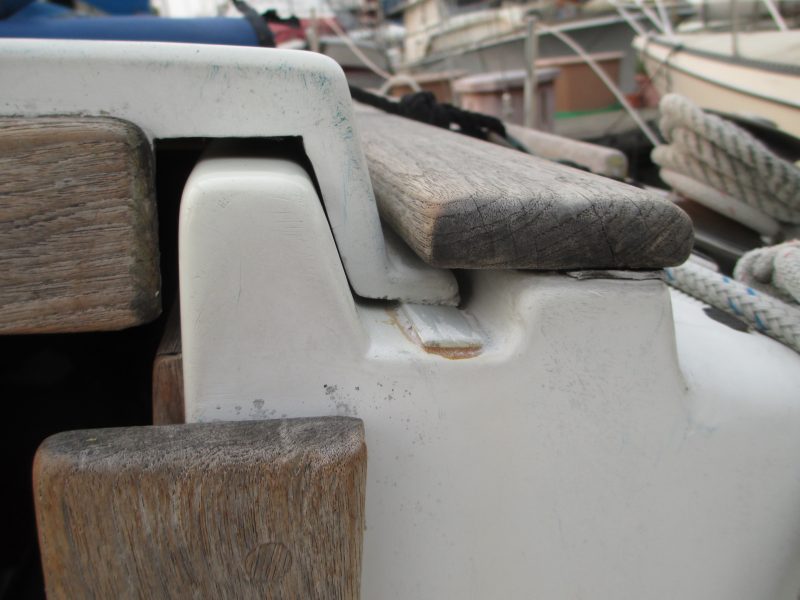
The companionway hatch runners were designed to fit into channels molded in the cabin top, both with gel coat surfaces. Teak cap rails were screwed into the cabin top over these channels, capturing the runners. The years had not been kind to these mated surfaces, and the sliding had worn the gel coat considerably. The substrate was showing in the channels, and even further wear was evident on the runners. The hatch clearance decreased as this happened, and a previous owner had cut out notches for allowance.
A proper repair would be to remove the teak rails and gain access to the hatch runners and channels, then build up the worn edges on the runners with fiberglass and resin to the original dimension, gel coat the surfaces of both the hatch and the channels, and reinstall the teak rails.
While I just summed up the project in two sentences, I was aware that it would not be as simple as that. Repairs often aren’t. It was February and not an ideal time to work with the necessary chemicals, or to be without a hatch. When I had more knowledge, time, and funding, I would tackle the proper repair. To tide me over until then, I decided to brainstorm for a stopgap solution to preserve the situation in its present state.
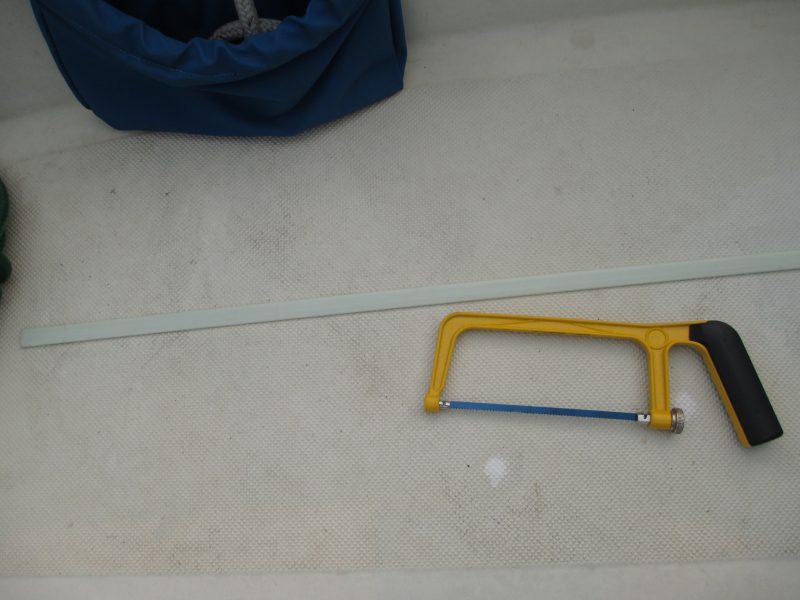
While I was looking through my storage unit, some old sail battens caught my eye, and I wondered, “What if . . .?” I took them to the boat and started experimenting. They were narrow enough to fit in the channels and thin enough to slide under the hatch. After fully inserting the first batten, I realized I could add a second, cut to fit, to cover the full length. Repeating on the other side, I sparingly glued these pieces in place with Gorilla Glue to keep them stationary in the channel.
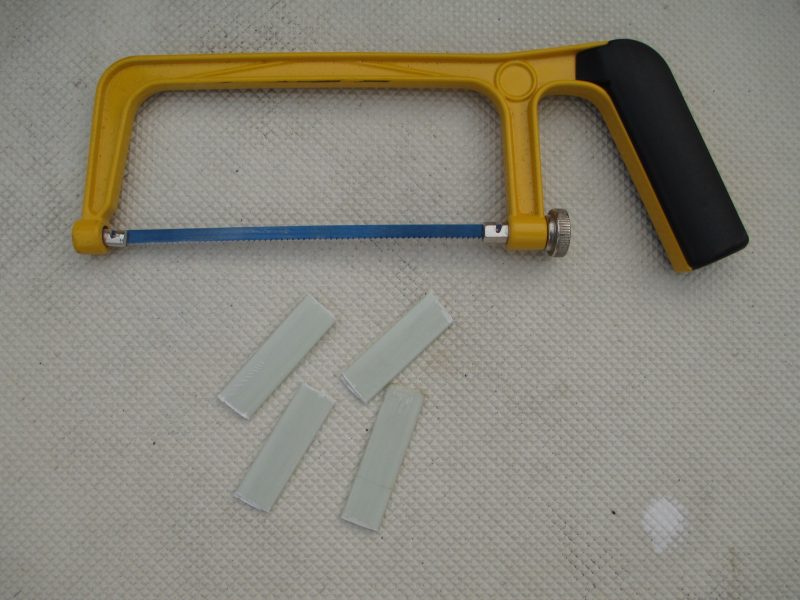
Taking more of the same batten material, I cut four 2″ long pieces. When glued to the hatch, these would serve as “feet.” I was able to lift the hatch just enough to insert the glue-coated pieces underneath each corner, its weight providing the set. Now the contact points are batten-on-batten when the sliding hatch is opened and closed.
This simple, stopgap solution has been working for six years. The battens protecting the channels have flattened some from wear, but haven’t needed replacement. The glue has been adequate to keep them fixed in position. The 2″ pieces used as “feet” on the companionway hatch are the sacrificial parts. The aft ones closest to the companionway need replacement most often. With heavy use, this has been about every 18 months or so. I replace the “feet” before they wear entirely away. If the hatch runners slide directly on the battens in the channels, which is very hard pultruded fiberglass, grooves will quickly form. It only takes a few minutes to cut and glue new ones on. In the grand scheme of boat maintenance, this task is small.
Their location makes them easy to inspect and service. On the original install, I used Gorilla Glue to fasten the feet. On one replacement, I had trouble with their holding, so I used rubber cement instead and it worked. I have since returned to Gorilla Glue with success.
This article was meant to demonstrate problem-solving with the resources at hand. Further wear to the channels and hatch has been prevented, allowing me enjoyment and use of the boat, and to focus on more pressing maintenance. I have been fortunate that it has continued to still serve me after six years. A proper repair is still on my list of to-dos. In addition to rebuilding the runners and channels, I plan to build a sea hood too.
For people who want to have big adventures on small budgets, The Resourceful Sailor hopes to give ideas on how to make this happen. Remember, keep your solutions prudent and safe, and have a blast.
Great solution! I like the creativity you put into fixing this problem in a very simple and effective way.
Thanks Gus!
May we have photograph of the solution?
Andrew, thanks for reading and your patience. I have been on a boat transmitting the Northwest Passage and am just getting back to a proper internet connection. The top photograph is the best of the final solution that was published. Since the hatch was not taken off, the view is very limited.
excellent solution – thanks for sharing.