
The Resourceful Sailor: Removing External Chainplates — An Unusual Tool Belt
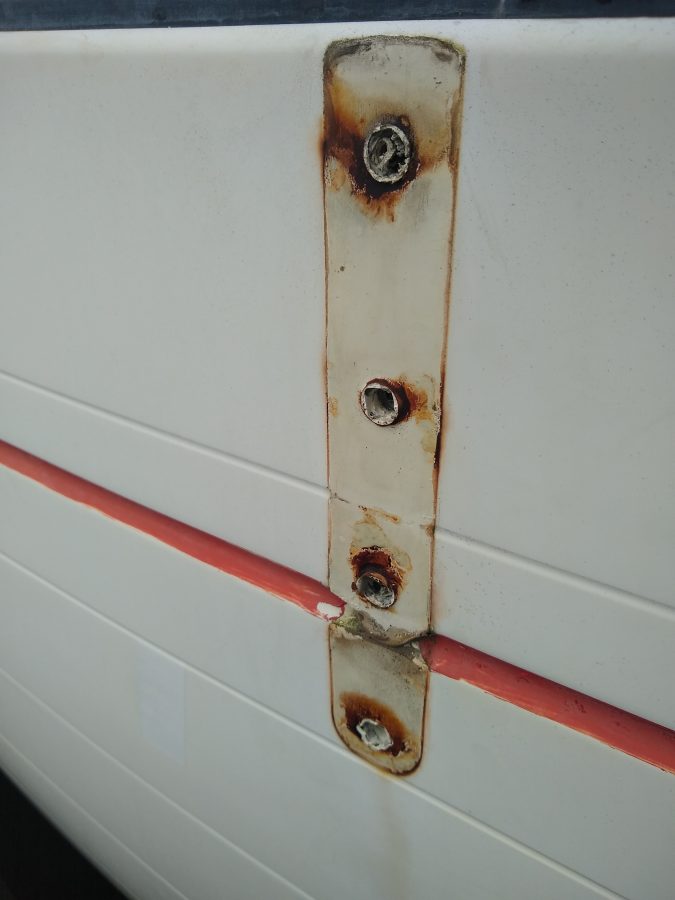
What do a Subaru scissor jack, a harmonic balancer puller and a hammer have in common? The Resourceful Sailor used all three while removing the chainplates from Sampaguita, a Pacific Seacraft Flicka 20 sailboat. It was determined while re-rigging that inspection, possible replacement and re-bedding were in order. Sampaguita has 10 externally mounted chainplates, through-bolted to the hull with stainless steel carriage bolts and nuts. Removing the inside nuts was not troublesome, but driving the bolts out ranged from slightly awkward to “are you kidding me?” This difficulty was due to the tenacious adhesive/sealant that still securely glued them in their holes. This installment will review the various tools and techniques the Resourceful Sailor used to drive these bolts out.
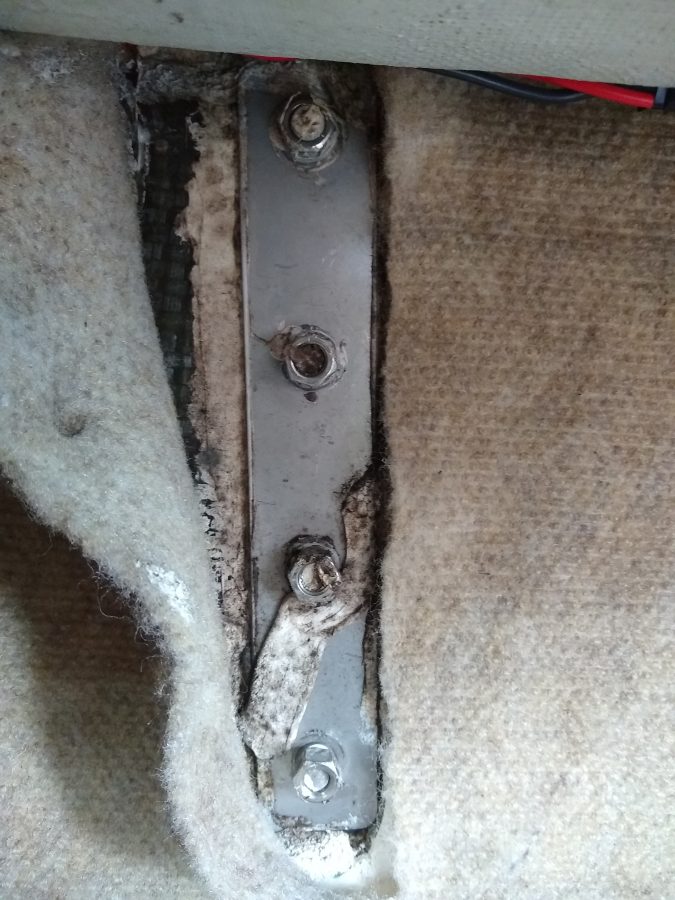
Carriage bolts have domed heads that provide little to no grip. The shank directly below the head is square, locking the bolt in the chainplate, and preventing rotation as the nut is tightened or loosened on the inside. They needed pushing out enough to use either a vise grip on the dome or a wrench on the under-head square section, while not marring the chainplates I might want to re-use. Once they were driven out a little, rotation was easy enough, and removal by twisting was possible. Overcoming that initial bond was everything.
I removed the aft lower and the bowsprit chainplates first, as they were low-hanging fruit as far as accessibility goes. There was enough swinging room for a hammer and punch (a hex bolt) to do the trick. Next came the fore lowers, a step up the ladder of difficulty. Their approach was a little more awkward. Shelving required a bit more boat yoga, and a bulkhead and bulwark troubled my right-handed angle of attack, but I eventually got enough driving force with the hammer and punch. The main shroud plates were even more challenging due to their alignment with the bulkhead. There was only just enough access to the nuts to back them off. Driving them out required a longer punch bolt with a janky, angled approach and a careful swing.
The pairs had become increasingly tedious and challenging, but were nothing compared to what was in store. Moving on to the dual backstay chainplates required a completely different approach.
Sampaguita has two full backstays with chainplates fastened in each upper corner of the transom. Access to the port side was by crawling headfirst into the coffin-like quarter berth, rolling over onto my back, and reaching up into the space between the transom and the coaming. Removing the nuts was easy. However, with only a few inches to work with and an overhead reach, how could I leverage the bolts out? An internet search turned up the idea of using a car jack. I thought, “There is no way my Subaru scissor jack will fit up in there,” but I had to try. Would you believe it worked?
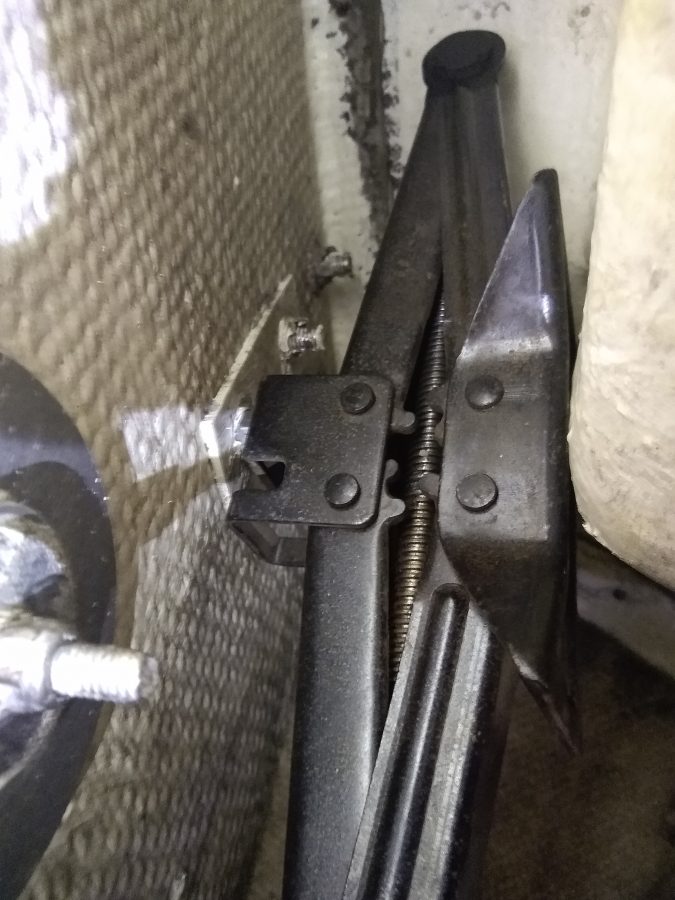
Wedged with the base against the coaming and the head on the carriage bolt, I used an adjustable wrench to open the jack. With the ability to lift a car, it had no trouble pushing out the bolt. The challenging part was positioning it in the tight spot and not dropping the six-pound angular steel artifact onto my face. Amazingly, it served to push out all three bolts on the port side.
The starboard side would be a bit of a finale regarding the challenge. Access was through a small cockpit locker. Too small for an adult to climb in. It required blindly reaching inside and then back up into the space between the transom and the coaming. I rigged a mirror to see what my hands were doing, and removing the nuts was, again, simple. I tried the jack again to drive out the bolts, but it was too big, heavy, and awkward to get into position. There were also other obstacles in the way, mainly the bilge discharge hose. Thinking outside the box now, I wracked my brain about what I might already own that could work.
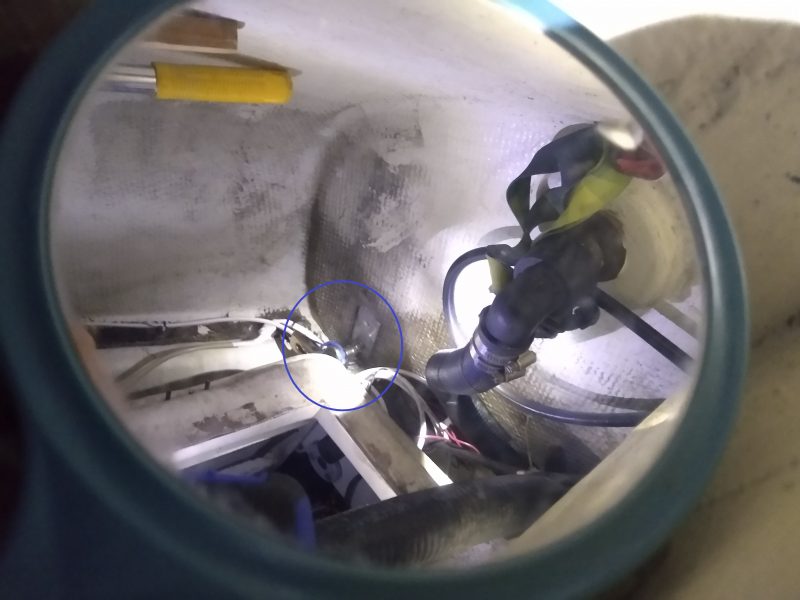
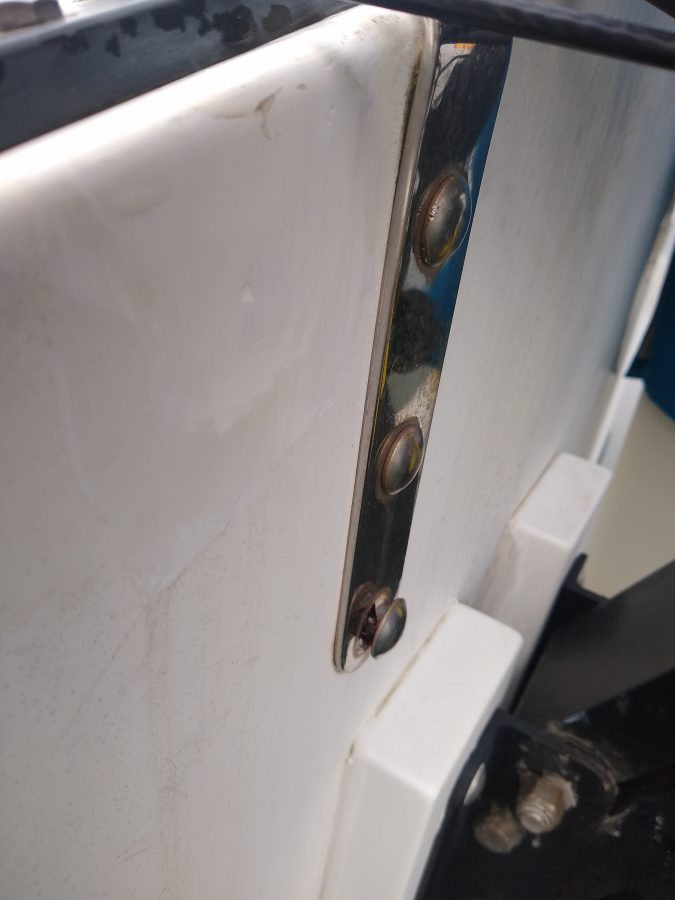
I remembered the harmonic balancer puller I’d purchased several years ago for an old Johnson outboard repair. Could I make that work? A harmonic balancer puller has a yoke with a center bolt. The yoke attaches to the balancer (imagine a wheel), and the center bolt aligns with the crankshaft (like an axle). Tighten down the center bolt, and the crankshaft remains stationary, pulling off the balancer. In this case, I intended to use it contrarily. The yoke would remain fast against the coaming, while tightening the center bolt would drive the fastener out.
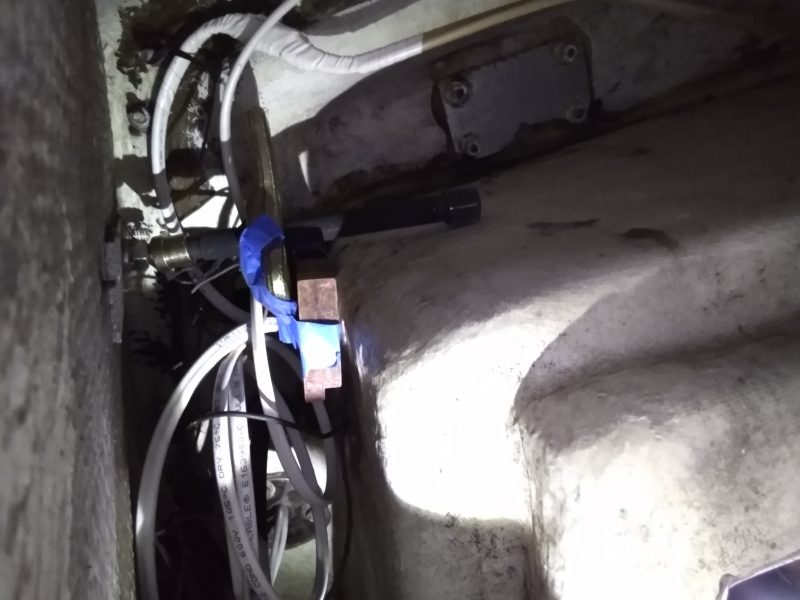
It was compact enough to handle and wedge into position, again utilizing the mirror for sight. The first tedious task was positioning. It took patience and perseverance to get it just right. That, and a block of wood taped to it as a spacer. Once it was in place, the limited access allowed the bolt about 1/16th of a turn at a time. Flip the wrench over to get a different angle, and take another 1/16th of a turn. Repeat. Again and again and again. Did I mention the center bolt has fine threads? Eventually, it pushed the fastener out. This technique worked for all three bolts on this chainplate. One trick that helped was putting the nuts back on the ends but only half-threading them on. They left a little cavity that captured the pointy end of the center bolt, helping it stay in place.
The next time you wonder what tool could work for a seemingly impossible boat project, there is often an answer outside the box. The internet led to the scissor jack, which led to my thinking of the balancer puller, a tool not used in years. What unusual tools have you used in a bind? The Resourceful Sailor hopes to inspire creative solutions for troublesome boat problems. Remember, keep them prudent and safe, and have a blast.
WOW, what a challenge!!!
I admire your determination and creativity in dealing with this incredibly demanding job. WELL DONE, many would have given up in desperation.
Gus,
Thank you for reading and the kind words. Some might choose different words like overzealous, masochistic, or stubborn. I prefer yours. Fair winds.
Heat Gun. Ten Minutes. Watch both sides for possible overheating. Works every time, even on 5200 adhesive.
Or that if you can. Thanks for participating.
Nice work on those Joshua. In looking at the pics I wondered if you had considered replacing the carriage bolts with hex heads. Wouldn’t look as smooth, but would give you something to grip from the outside next time you go to remove them.
Thanks for the kind words. I did consider that. I am an avid do-it-by-my-selfer, so the carriage bolts allowed me to do that. I am hoping this will be the last time for these. That I didn’t use 5200. Thanks for reading and participating.