
The Resourceful Sailor Builds New Spreader Tips
While the Resourceful Sailor continues his passage from Anacortes, Washington, to Brittany, France, we thought we’d share another of his “resourceful” solutions — this time on replacing the old spreader tips on his 1985 Pacific Seacraft Flicka 20 Sampaguita.
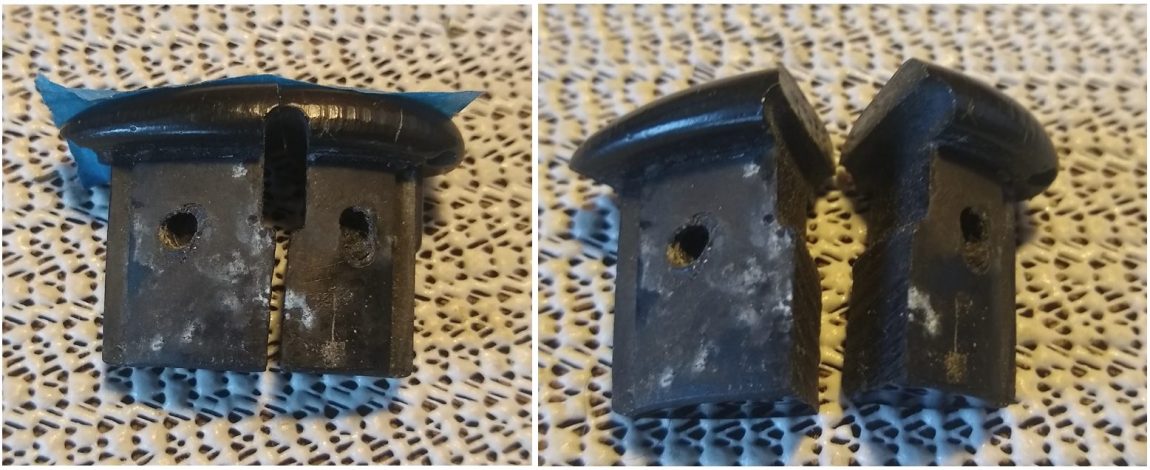
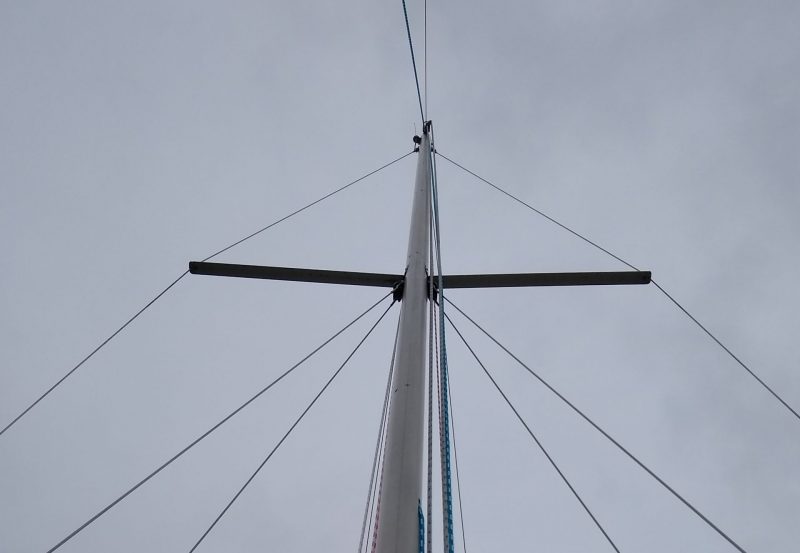
The re-rigging of Sampaguita presented many challenges. This installment of The Resourceful Sailor will focus on the molded urethane spreader tips used to encapsulate the 3/16-inch stainless steel wire shrouds. I suspected they were original, and while they were not in terrible shape, one retaining screw had stripped out, and they’d had 36 years of environmental exposure. They still seemed to function well, but I had been considering replacing them out of prudence. The decision was made for me when one broke while I attempted to remove it from the old wire for the new. The urethane had hardened and become inflexible, and split in half.
In consultation with my riggers, we considered purchasing new replacement tips, which are now nylon, or manufacturing our own. The replacements were inexpensive, but the vendor was a known wild card. They would capture the wire well but hold it directly against the outer end of the aluminum spreader, similar to the old urethane tips. The stainless steel wire under tension against the aluminum spreader, under compression, had begun to erode and corrode a groove in the spreader end. Evidence of this on Sampaguita was slight, but I have seen worse on other boats.
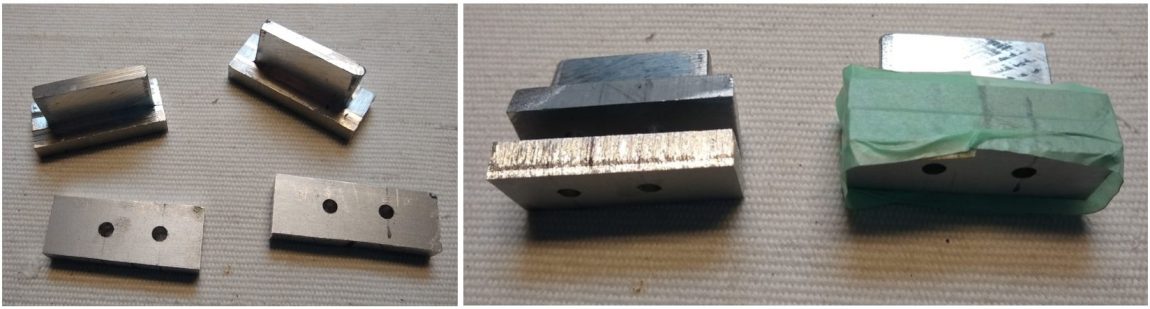
The riggers suggested we make our own spreader tips out of aluminum. We could make an insert with a tab that slid into each slotted end of the spreader. Then a cap would be fastened to it, encapsulating the wire shroud. I decided to go this route as it seemed like a more robust tip than the urethane or the nylon, and also addressed the harsh wire-to-spreader contact.
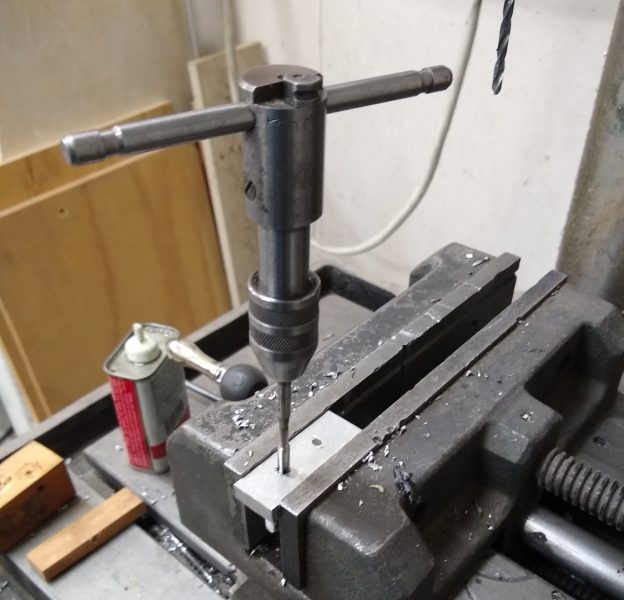
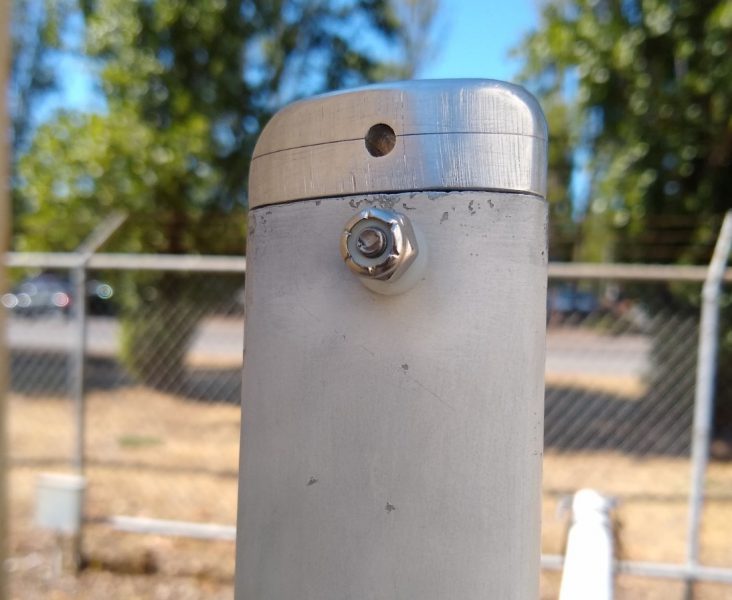
We found some scrap aluminum in the shop and cut four small rectangular pieces. Two would be the inserts, and two the caps. The rigger used a jig and circular saw to cut the tabs on the inserts for a precise fit. I took over from here, taping the would-be inserts to the would-be caps. I used a Sharpie to outline the profile of the spreader. The tracings would help guide where to drill and, later, sand. I used a drill press with a #25 bit to make two holes through the cap into the insert. I would thread these two holes with a 10-24 tap and countersink them to receive 10-24 x 3/8-inch stainless steel machine screws. Then, I turned it 90 degrees and drilled a 17/64-inch perpendicular hole through the center, where the two pieces met, to receive the cap shroud.
Keeping them assembled, I used a disc sander to shape the tip to match the spreader profile and round the edges. The friction of the disc sander quickly made the small pieces hot. I traded off working with each tip to keep them cool. Note: They will have different fits when they are hot and cold.
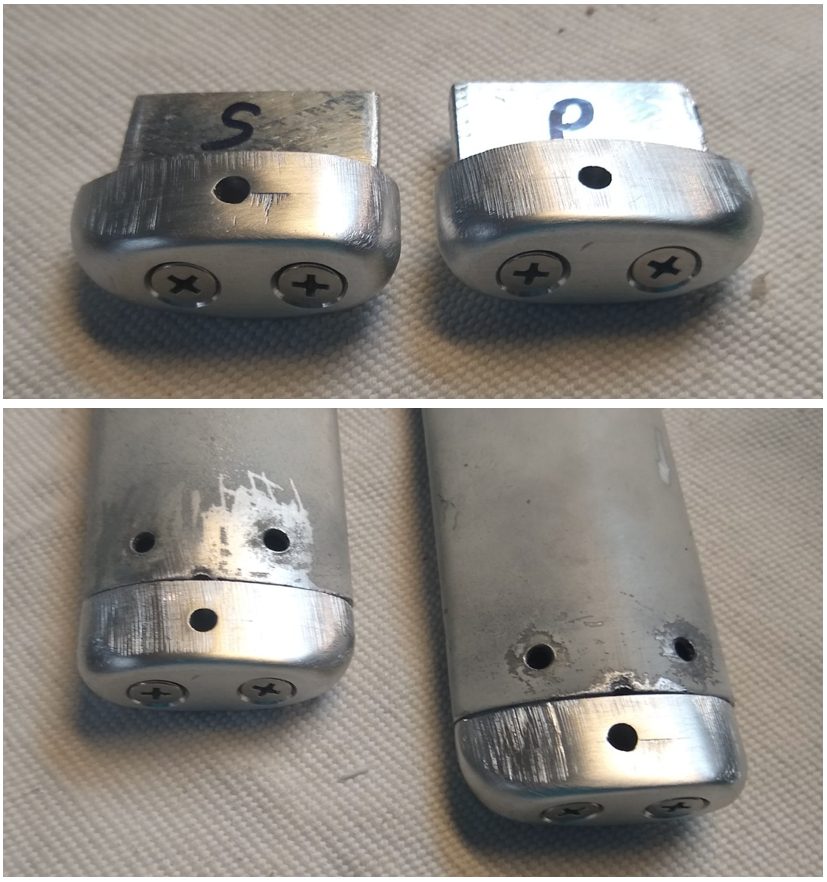
After I achieved the desired shape, securing them to the spreaders was next. The urethane tips used two screws that threaded through the spreader and into them. I decided that was a bit complicated to achieve with the new aluminum tips. Instead, I plugged the old holes with aluminum rivets and drilled a single hole through the top and bottom of the spreader and insert tab. I through-bolted this with a #10 machine screw and nyloc nut. For the final bit, I used some Scotch-Brite™ 7447 to fine-tune the fit, polish up the ends, and remove any rough edges.
On the rigging install, I discovered I needed to enlarge the shroud pass-through hole 1/64th of an inch for a better fit and to avoid wire kink at the tip. I used ample LanoCote® on all of the stainless steel fasteners to mitigate dissimilar metal corrosion of the aluminum in hopes I will be able to take them apart in the future. I do wonder if Loctite might have been a better choice. Adding rigging tape over the cap-to-insert screws to prevent their loss may give me peace of mind, and baggywrinkles will cover the spreader tips, but that will be another article.
The Resourceful Sailor had a choice to take a chance with non-returnable, superseded, new-old-stock, nylon replacement tips from a distant vendor or to manufacture his own. The vendor would be the easiest and most efficient route if it went well. However, the robustness of the aluminum, and the prevention of direct contact of the wire shroud against the spreader, were worth the minor extra work and expense. Plus, it was right up the Resourceful Sailor’s alley. Remember, keep your solutions prudent, and have a blast.
Aluminum is robust but this seems like the kind of job that 3D printers were invented for.
RC, thanks for reading. I agree. I have thought similarly about sheaves and discontinued hardware. However, there aren’t any local marine businesses offering this service and the Resourceful Sailor doesn’t have one either. So we fall back on what’s accessible and within our means.
Joshua, I assume the spreaders are clamping on the wire? How di you size the hole that the wire passes through? I am making a similar pair myself now