
Shedding Light in the Engine Room
Kinked necks, bloody knuckles and strained eyes are three things every sailor suffers from after working in a dark, cramped engine compartment. A visit to the chiropractor can solve the first problem and a decent pair of mechanic’s gloves can help with the second, but the third isn’t as simple or inexpensive to fix… or is it?
©2016Latitude 38 Media, LLC
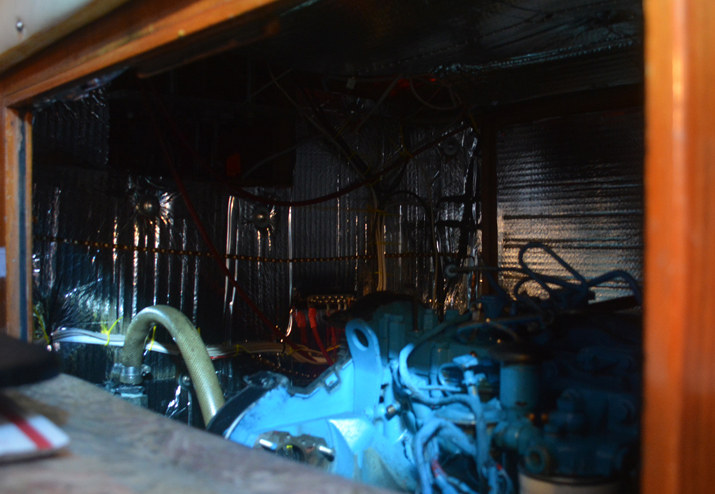
Engine rooms on most sailboats are wedged into that typically hard-to-reach hollow under the cockpit. That’s bad enough, but the solitary dome light many manufacturers provide — if a light is installed in the first place — can’t possibly provide enough illumination to see all the nooks and crannies sailors need to access to properly service their engines.
The good news is that you don’t need a fat budget or an electrical engineering degree to shed some light on the subject. This author’s husband, Rob Tryon, installed the engine room lighting system in our Wauquiez Centurion 47 Gazelle in an afternoon, and the entire project came in at about $75.
©Latitude 38 Media, LLC
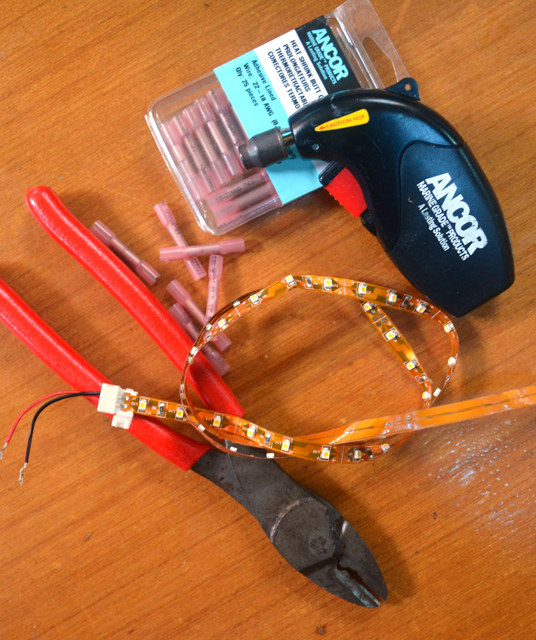
What you need to buy:
- 1-3 LED light strips ($12 ea) — We used three strips of warm white 2700k, but if your engine room is smaller, or you don’t have a light fetish as Rob does, one would probably be sufficient.
- 1 dimming controller ($3) — You could also connect the system to a switch on your main panel, eliminating the need for a controller.
- 1-2 sets of strip connectors ($6 ea) — We bought two sets to connect our three light strips.
- Ancor heat-shrink butt connectors — A box of 25 costs $11 but you will only need a handful.
- Ancor 18-gauge duplex wire (61¢ per ft) — The quantity will vary but we only needed a few feet.
- Ring connectors (approx $3) — Size depends on your power source; we connected directly to our starting battery.
- Dielectric grease ($3.49)
- Appropriate fuse (approx $5) — You could also use a more costly circuit breaker.
Tools:
- Wire crimpers
- Screwdriver and fasteners for the dimmer
- Butane torch (a Bic lighter also works)
- Rubbing alcohol
To make the installation easy, work up a diagram to plan out the system — how to get from your power source to the engine compartment, and where the strips and dimmer will go. That process will probably take longer than the installation itself.
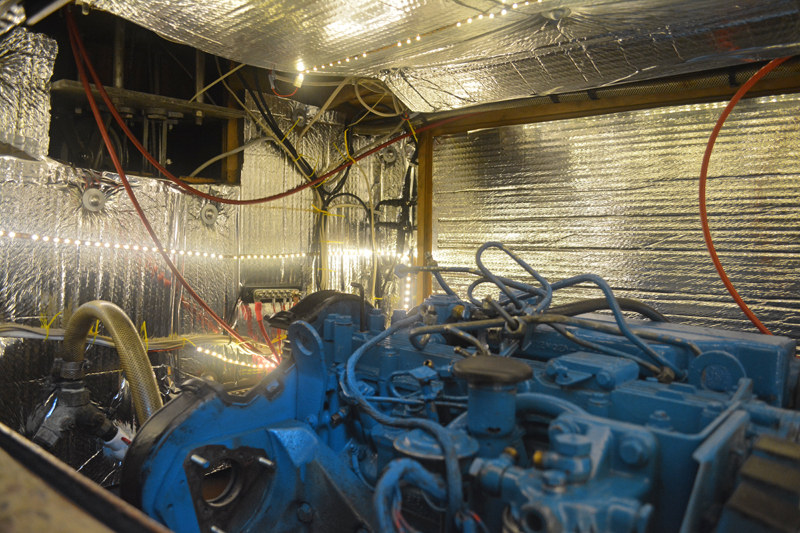
Surface prep is important. Rob had just ripped out the old sound insulation and replaced it with West Marine’s foiled version, which makes an excellent sticking surface for the light strips’ adhesive. To be safe, he still cleaned it with alcohol before starting. Lesson learned: Peel off only a few inches of the backing at a time during the application for easier handling.
©2016Latitude 38 Media, LLC
Then it’s just a matter of wiring the strips in parallel (red wire to red wire, black to black) using the heat-shrink butt connectors — with a dab of dielectric grease on each end — so you end up with one set of wires going to the dimmer/switch. From the dimmer, run it to either your battery or your power bus. Be sure to install an appropriately-sized fuse — each strip draws one amp so we used a five-amp fuse — just before the power source.
That’s it! That’s all you need to make working in your engine room an utter delight. Okay, okay, but at least you’ll have enough light to watch the blood drip off your knuckles.